I'm so excited to be here this month with you all. I thought I would start on my Christmas cards a bit early this year. Mind you, this doesn't mean that I will get them all done in time but at least I'm trying.
I have been loving interactive cards lately and I have to admit that I did have a hard time at first with these. Just trying to figure out the logistics of each card and what I want it to sure makes my brain work but it's so much fun!
I coloured in the sweet little fairy with my copics and set her aside. I coloured the background with distress ink (peacock feathers & seedless preserve) and die cut the panel with the largest LF stitched rectangle die. I took the slide on over dies and found the one that matches the town boarder and die cut that as well. I then added two layers of fun foam to the back making sure to leave enough room for my penny to slide back and forth.
A helpful tip is to make sure you add in the penny BEFORE adhering the panel. I was able to add it in but it wasn't fun. I then added the fairy to my penny so she can fly over the town waving her wand.
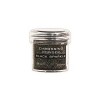
I die cut the clouds and town border from white card stock and also used the rectangle die so the stitching will be all around. I heat embossed the sentiment with sparkly black embossing power to the Little Town border panel and then adhered the clouds and little town to the card base and added some stickles to the edges.
I know this is a long post and I'm happy that you stuck around.
Thanks for stopping by!
Coralynn


