Showing posts with label watercolouing. Show all posts

Saturday, December 24, 2016

MOS - Season's Greetings

Hello everyone,

I can't believe it's Christmas Eve already! Are you ready?  I actually am ready two days earlier this year which is saying a lot for me. 

For my card I used the ornament from the Trim the Tree set and heat embossed it with white embossing powder.  I watercoloured in the image and I'm really into splatter lately so I wanted to use it on my card today as well. 


I used the sentiment from the Cardinal Greetings set and stamped it using Versafine Onyx black ink.  I then die cut the panel and added it to the black card front.  


I want to wish you all a wonderful holiday season and get to spend time with family and friends.

Thanks for stopping by!

Coralynn  :)

Thursday, December 15, 2016

Holiday Card Series - Merry Christmas

Hello everyone,

I'm back with more cards for my Holiday Card Series.

I have a set of cards that a coworker ordered and these were fun and easy to make.  

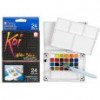
I started out with Canson XL watercolour paper and cut out A2 sized panels.  I used my Koi watercolours and unfortunately they don't have names. 

I added the colour the each panel with water and then heat set them between layers.  I added a little at a time to get the depth of the hard and soft lines.  Once they dried I added some splatter with some black paint from the same palette.  


I took the Merry Christmas sentiment die from Simon Says Stamp and I die cut it four times out of metallic paper that I found at my local dollar store.  I adhered them to the watercolour panels and then added those to regular card stock card bases. 


For these cards I pulled out my distress stains in Barn Door and Tattered Rose and Faded Jeans and Tumbled Glass and just stamped them all over the paper and the sprits them with my Distress sprayer.
After they dried I added some gold and silver splatter with the same colour distress inks.


I then cut out more of the Merry Christmas sentiments from the same paper as the ones above and adhered them to the card with Tombow Mono.  Once that was all done I added the panels to regular card stock card bases and called them done.


Thanks for stopping by, see you again soon.

Coralynn  :)

Supplies:


Saturday, September 24, 2016

Mint Owl Studio - Merry Christmas

Hello everyone,

I'm back with another Christmas card for you using the Trim the Tree stamp set.  And did you know we now have coordinating dies as well?

I started out with a pice of watercolour paper and I added a couple of different blues to the card with my watercolour paints.  I did this in layers and heat set each layer before adding more colour.  I happen to love the harsher lines this technique gives.


I then stamped the ornaments in Versamark and heat embossed it with silver embossing powder.  I then took my Versamark pen and added the lines that the ornaments are hanging from and heat embossed them again along with the sentiment.

I then added a few dots using the Nuvo drops in glitter and let that dry before adhering the panel onto a card base.  I always manage to stick my finger in these dots thinking they are dry enough, and they never are.  But this time I put the card up so I wouldn't keep checking on them.  ;)


Thanks for stopping by, see you again soon!

Coralynn  :)


Saturday, July 30, 2016

Happy Birthday - Mint Owl Studio

Hello everyone,

I'm back today with a water colour birthday card.

I have been doing lots of water colouring lately and I have always loved embossed sentiments on a watercolour background.  So this is what I have for you today.


I used the Happy Moments stamp set and heat embossed the sentiments with white embossing powder.  The happy is directly on the watercolour panel and the birthday is on a piece of black card stock from my stash and cut it out with my scissors and popped it up with foam tape.


When I have a panel that is warped because of the water I add fun foam to the back so that I have a solid piece to help straighten the panel but this one was a bit harder to do.  I had to set something heavy on top of it overnight in order to get it so that it wasn't warping the card base.  Oh the troubles we go through to get a perfect card!  LoL!!

That's if for me today, thanks for stopping by.

Coralynn  :)