Sunday, July 31, 2016

AAA Card Challenge #70 - Stitching


Hello everyone,

We are back with Game #70 here at AAA Cards and it's all about stitching. 


www.aaacards.blogspot.com


Sponsor: www.uniko.co.uk


Prize: £10.00 certificate

GD Beverley from Uniko

&

EunJi from Follow your Dreams


I love stitching on my cards but I thought I would branch out and use actual stitching from my sewing machine.  Well let's just say it's the thought that counts because all went wrong short of breaking a needle, which thankfully didn't happen.  But I decided to move on and try it again another day.  


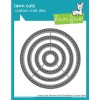
I ink blended Mint and Audrey blue SSS inks onto vellum and heat set it (ink doesn't dry as fast on vellum as it does on card stock.  I then took one of the cross stitched circle dies from Lawn Fawn and die cut the vellum.  


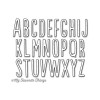
I then die cut the work hello from white card stock with MFT's Emmitt alpha dies and adhered it to the die cut circle and the used that space to add adhesive and added it to my card base.  This would be a great card to mass produce but the little letters can be a bit tedious to add.  Mind you I'm the type that likes having all the letters straight but that rarely happens that way.  


How to Win:
Link up your card
Mention us in your post
Display our challenge image

Leave a comment on three other blogs – let’s spread the love!


Thanks for stopping by, see you again soon.

Coralynn  :)


Supplies:

Saturday, July 30, 2016

Happy Birthday - Mint Owl Studio

Hello everyone,

I'm back today with a water colour birthday card.

I have been doing lots of water colouring lately and I have always loved embossed sentiments on a watercolour background.  So this is what I have for you today.


I used the Happy Moments stamp set and heat embossed the sentiments with white embossing powder.  The happy is directly on the watercolour panel and the birthday is on a piece of black card stock from my stash and cut it out with my scissors and popped it up with foam tape.


When I have a panel that is warped because of the water I add fun foam to the back so that I have a solid piece to help straighten the panel but this one was a bit harder to do.  I had to set something heavy on top of it overnight in order to get it so that it wasn't warping the card base.  Oh the troubles we go through to get a perfect card!  LoL!!

That's if for me today, thanks for stopping by.

Coralynn  :)

Saturday, July 23, 2016

Gel Well Card Set

Hello everyone,

I am back with a couple of cards for you today.  If you read my last post, I'm trying to create more than one card so I made two.  I will soon work up to 4 or five soon!

I used the Get Well Critters and with white embossing powder, heat embossed the adorable Dino to created a background.  I then took distress ink and blended it around the edges and left the middle a bit lighter.


I used some black glitter spray and added splatters to the background for interest.  Then I cut out the banner from some ivory card dock and stamped the sentiment with black ink.  To finish off the card I added some enamel dots to the top right hand corner.


Here is the second card I created using the same techniques but with a different colour distress ink.  I also spritzed the card base with water droplets and wiped it away with a paper towel.  I did this for both cards.


I added the same banner and stamped the sentiment with black ink but instead of enamel dots to finish off the card, I used some natural twine that I added to the banner die cut.


Thanks so much for stopping by, see you again soon!

Coralynn  :)

Sunday, July 17, 2016

AAA Cards Game #69

Hello everyone,

We are back with a new Game.  Stash Favourite.  I have to say my stash favourite would be rectangle dies.  It's the one thing that I use the most in my craft room.

17th July 2016

Our Sponsor - Stampendous
$20 Gift Certificate


Guest Designer

Ksenija Sweet Kobylkin


For my card today, I started with a scalloped stitched rectangle die and I found out that this die will cut out two panels perfectly from an A2 stop fold card scored at 4.25.  That makes it fold on the long side so I can cut the base in half and get to small note cards.  This helps me with making multiple cards which is something I am working on.

I started out with an A2 sized card base and cut it in two.  I then took one of he scalloped rectangle dies from MFT and cut out two panels.  You can also get two out of an A2 sized piece of card stock.

I then used Fog in on a dotted background stamp from MFT and added that to the card base.  I used the sweet little kitties from MFT that I coloured in for Kathy's the 30 Day Colour Challenge from The Daily Marker.  


I adhered the kitty to the pillow and popped it up on foam tape.  I stamped the sentiment in Slate ink.  I didn't want to add anything more because they are so small but will make great note cards for presents or just because notes. 

Below are two more that I made in the same way.  


How to Win:
Link up your card
Mention us in your post
Display our challenge image

Leave a comment on three other blogs – let’s spread the love people!


Thanks for stopping by, see you again soon.

Coralynn  :)


Supplies:

SaveSave

Saturday, July 16, 2016

Tic Tac Toe Challenge Fourteen

My first post for today: Mint Owl Studio Post
Hello everyone,

We are back with another challenge.


My choices today are
Embossing / Shaker Card / Paper Piecing


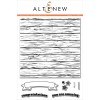
 I started out with the Sunshine Layers die from WPlus9 and cut out the front panel.  I then used the MFT Peek-a-Boo die and cut out the window for the shaker. I turned over the panel and added the acetate to the window and used fun foam to add the space required for the sequins.  After I added the sequins to the card I felt the background was too plain so I used the Altenew woodgrain background stamp and used hot fudge MFT hybrid ink to stamp onto the negative die cut from the window.  I added that to the back of the card and added score tap to the fun foam and added that to the card base.


I used the fun owl from Mint Owl Studio's Outrageous Owls stamp set and coloured him in with copics and for his wings, belly and eyebrows I used the Simple Stories Wood and Notebook Basic wood grain paper.  I cut out a banner from brown card stock with the SSS sketchy banners dies and heat embossed the sentiment with white embossing powder.  

 I then popped the banner and image on foam tape and call the card done.

Thanks for stopping by, see you again soon.

Coralynn  :)

Supplies:


90's Party

Hello everyone,

We hope you had a chance to hop along with us for our July Release blog hop yesterday.  We had lots of fun creating all the fun projects for you.

My card today was created with the 90's Party stamp set and I have to say this brings back lots of memories.

I started with a piece of distress card stock stamped the pixel type stamped and heat embossed with white embossing powder.  Then I used my distress inks to colour the background.

I then cut out the front panel out with a rectangle die along with another white piece of card stock with a larger rectangle die and adhered it to the card base and popped up the front panel with foam tape.

I stamped the cassette tape (Wow! I haven't said that in years.) with black ink and coloured it in with copics.  I got the idea from DT member Lisa as she wrote on her tape as well.  I remember doing this "back in the day" with my tapes too.  


I thought the tape needed something more behind it so I stamped and heat embossed some of the element stamps in the set and adhered them to the card.  I added popped up the tape and stamped the sentiment with black ink, added a few home made enamel dots and called it done. 


Thanks so much for stopping by, see you again soon.

Coralynn  :)


Friday, July 15, 2016

Mint Owl Studio July Release Day Blog Hop

Hello everyone,

I'm here with my very first post for Mint Owl Studio and I couldn't more exited!


Get Well Critters


For my card today I decided to use the Get Well Critters set.  The critters are adorable and I love the little band-aid stamps.  As soon as I saw them I knew I had to use them for a background.


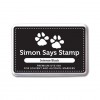
I used light blue ink and the small band-aid stamp and created the background.  I then took a die cut circle from my stash and did some ink blending with the same light blue ink and popped it up with foam tape.  I stamped the crutch onto the die cut with black pigment ink.  Then I took a piece of black card stock and heat embossed the sentiment in white embossing powder and adhered it to the card base. 


You're next stop is the very talented Tara.  

Hop Order:

Coralynn - you are here!


We're also giving away the entire new release!  Want to know how to win?  All you have to do is comment on this blog and each of the blogs on the hop.  The winner will be randomly chosen from one of the blogs, so the more blogs you comment on, the better your chance is to win!  Good luck!


Thanks for stopping by, see you again soon.

Coralynn  :)