Showing posts with label MFT. Show all posts

Sunday, March 19, 2017

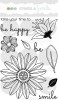
Hugs, Smile, Friend

This is the second post for today.  Click here for my AAA Cards post. 


Hello everyone,

I'm over on the Butterfly Reflections Ink blog today.  I hope you'll head on over to see all the details on my card.


Thanks for stopping by, see you again soon.

Coralynn  :)

Sunday, January 22, 2017

AAA Cards Game #82 Winter Chill

Hello everyone,

We have a new game with AAA Cards and it's all about the winter chills.  It's not cold here but it did snow a bit and I'm happy.  It's nice to have it all white again.


I started out with a piece of watercolour paper and used my Mission Gold watercolours to colour the panel.  I then took a snowflake die and cut out part of the panel. 


I then added it to an A2 sized card base with liquid glue.  I then heat embossed the sentiment with white embossing powder on a piece of black card stock from my stash. I added some foam tape and added it to the card base.  


This is pretty easy are to make and would be great to mass produce for winter wedding or birthday cards or even after Christmas thank you cards.  


Our sponsor this month is:

Stamplorations 


Prize: Framed Cardinal stamp and the Warm Winter Wishes CUTplorations die

+ 10% coupon offer for players


Thanks for stopping by, see you again soon!

Coralynn  :)

Supplies:

Saturday, December 3, 2016

Holiday Greetings


Hello everyone,

I'm back with another holiday card and it was pretty easy to put together.  This would be a good one to mass produce.

I used the reindeer from the Deer Santa stamp set and I just stamped out his head and coloured him in with my copics.  I then fussy cut him out and went around the edges with a black marker to them up.


 I then cut out the circle in the middle of the card and after I used a triangle die to cut out the panel.  I then used a piece of grey kraft card stock cut out another panel with the scalloped rectangle and added it to an A2 sized card base. I cut out a little piece of patterned paper and added it behind the circle.  I then popped up the front panel with fun foam and added foam tape to the reindeer.  And as usual I forgot to stamp my sentiment.  So luckily I used fun foam so it stamped nicely.  I used the Cardinal Greetings stamp set with black ink.


To finish off the card I added some sequins from the Mint Owl Mix.

Thanks for stopping by, see you again soon!

Coralynn  :)


Sunday, October 9, 2016

AAA Cards Game 75 - Photo Inspiration

Hello everyone,

I'm back with a fun card for our newest challenge over a AAA Cards and it's a photo inspiration (see end of post for more details and photo). This is a fun one as I love rainbows and colour.

I stamped the leaf image from Create a Smile a few times with my mini MISTI so I could get a good impression. I went through my copic stash and found two colours per colour family and started colouring in the leaves.


Once I had them all coloured in I fussy cut them out with my scissors and went around the edges with a Memento marker to give it a cleaner look. I then cut out a vase and thanks from MFT and then went to town with the sparkle.  I added it to just about everything on this card. I know, I have a problem but it looked much better with it.  


Be sure to head over to the blog to see what the other DT members have done.  The details on how to play and a linky to add your card is over on the blog. 


Our super duper sponsor for this game is Happy Little Stamper and we couldn't be more excited.


Picture

$20 Gift Certificate

See you again soon.

Coralynn  :)


Tuesday, August 16, 2016

Tic-Tack-Toe Challenge Sixteen

Hello everyone,

Today I am here with my very last post for the Stamping Smiles Designs - Tic-Tac-Toe challenge.
I can not thank Ka enough for the wonderful opportunity of being with such a great team with amazing designers.  Enough with the mushy stuff, let's get to my card for this challenge.


My choice for today's challenge is:
Hexagons/Misting/Birthday

I used the MFT chicken wire cover up die and cut it out of white card stock. I then added Glad press and seal to the back so that all the little pieces would stay together and I took the inks and blended them from dark to light. 


I took the colour shine and spritzed it once onto the panel.  I then took away the positive part and used the negative pieces.  I added foam tape pieces to each hexagon (yeah, worth it but not fun) and then added it to a card base.  I then took some navy card stock from my stash and cut out the happy birthday die and adhered it to the hexagons.


Thanks for stopping by, see you again soon!

Coralynn  :)

Supplies:

Sunday, August 14, 2016

AAA Card Challenge #71 - Blending


Hello everyone,

We are back with a new challenge at AAA Cards and it's one of my favourite techniques - BLENDING!


Picture

$20 Gift Certificate

Guest Designer

Michelle Bala from Passionate Crafter


I was playing around with my background/coverup dies the other day and I made a few cards with similar styles and I used the positive and negative pieces. 

For this one I used the positive (at least I think it's positive!) part of this Chicken Wire coverup die.  I have a little confession to make.  When I purchased this die, I was looking for just the hexagons and that one wasn't in stock so I thought I would get this one as it was the same thing just a different brand.  Well when I got it in the mail I took it out and realized that it has little bumps on the sides of the hexagons that does look like chicken wire.  Now one would think the name itself would tell me this, but noooooo!  LoL!!  Oh well, I still enjoy the die. 


I used white card stock to cut out the die and added Glad press & seal to the back in order to keep all the pieces together.  I then used three colours of blue ink to blend it out to white.  I then used some navy colour shine spray to add the little splatters for interest.

I have little baggies of die cut words and images that I start and sometimes colour but don't end up using on a card so I went through and found this Happy die and the birthday and added them to the card.  I almost added some sequins and enamel dots but I am really trying to not add all the little embellishments all the time.


How to Win:
Link up your card
Mention us in your post
Display our challenge image

Leave a comment on three other blogs – let’s spread the love!


Thanks for stopping by, see you again soon.

Coralynn  :)


Supplies: