Showing posts with label Butterfly Reflections Ink. Show all posts

Sunday, November 12, 2017

AAA Cards Challenge #103 - Celebrate

Hello everyone,

We are back again with a new challenge - Challenge 103 - CELEBRATION.  It's all about celebration, so get out those stamps and dies and let's see what you're celebrating.

Can you guess what I'm celebrating?  Yes, that's right, Christmas!!!  I always say that I'm going to get a head start on my Christmas cards and every year I bearly get any done at all.  

So this year I made sure that I did and I started with this guy.  Isn't he just the cutest? 


I stamped and coloured him with my copics and die cut him out.  I had added black gel pen to his eyes but I messed one of them up so I had to add little googly eyes to cover it up so I wouldn't have to start over.  I added sparkle and some Novo crystal glaze to the little lights.  Before popping him up on foam tape I added a few trees to the background with green ink. I then stamped the sentiment with black ink and called it done. 


Our wonderful sponsor is Happy Little Stamper and one lucky person will win a $20 gift certificate


Thanks for stopping by, see you again soon.

Coralynn :)


Sunday, March 19, 2017

Hugs, Smile, Friend

This is the second post for today.  Click here for my AAA Cards post. 


Hello everyone,

I'm over on the Butterfly Reflections Ink blog today.  I hope you'll head on over to see all the details on my card.


Thanks for stopping by, see you again soon.

Coralynn  :)

Tuesday, December 20, 2016

BRI #Hashtag Stamps Blog Hop

Hello everyone,

I'm super excited to be joining the BRI #Hashtag blog hop to promote the new collab stamp sets with BRI and Bossy Joscie. You should have come from the amazingly talented Laurie.

These sentiments are fabulous and fun to play with.  Links and the next in the hop are at the end of my post. 

I recently bought the Mission Gold watercolours and couldn't wait to use them.  I cut out a panel from a stitched rectangle die from Lawn Fawn and added the peacock watercolour.  I used my het gun to heat set the colour as I went because I wanted to have the harsh lines.  


I used Versamark ink and stamped the bold sentiments to the front panel and heat set with white embossing powder.  I then stamped the #hashtags with Hero Arts black dye ink under the bold sentiments.  To finish off the card I added some white Nuvo drops that I had made and called the card done.  


No hop would be complete without prizes, so to be eligible to win one of the two new sets, leave a comment on all blogs by Monday, December 26, 2016 at noon.  Winners will be annonced on the Butterfly Reflections Ink Blog on Tuesday, December 27th.

Now you're next stop in the hop is Kimberly.


Below is a list of the hop just in case you didn't get in at the start.  

Coralynn - You are here. 

Thanks so much for stopping by, see you again soon!

Coralynn  :)

Supplies: 

Saturday, December 3, 2016

Holiday Greetings


Hello everyone,

I'm back with another holiday card and it was pretty easy to put together.  This would be a good one to mass produce.

I used the reindeer from the Deer Santa stamp set and I just stamped out his head and coloured him in with my copics.  I then fussy cut him out and went around the edges with a black marker to them up.


 I then cut out the circle in the middle of the card and after I used a triangle die to cut out the panel.  I then used a piece of grey kraft card stock cut out another panel with the scalloped rectangle and added it to an A2 sized card base. I cut out a little piece of patterned paper and added it behind the circle.  I then popped up the front panel with fun foam and added foam tape to the reindeer.  And as usual I forgot to stamp my sentiment.  So luckily I used fun foam so it stamped nicely.  I used the Cardinal Greetings stamp set with black ink.


To finish off the card I added some sequins from the Mint Owl Mix.

Thanks for stopping by, see you again soon!

Coralynn  :)


Monday, November 21, 2016

Thanks!

 Hello everyone,

Update:  I'm very excited and honoured to say that I was chosen "Top Mow-It-All" for this challenge!


I'm here with a thank you card for you today.  I absolutely love this set by Lawn Fawn and I think it's one of my most used.

I started with a white card stock panel and used a chevron embossing folder and ran that through my die cutting machine.  I then took the stitched oval dies from LF and cut it out of an ivory piece of card stock an with the sweet little faces from the Thanks a bushel set, stamped them all over the panel with SSS chocolate ink.  I stamped the little heart with SSS Teeny Bikini ink.


I had this banner die cut in my stash (I can't remember who it's from, sorry!) and it fit perfect, so instead of trying to find a coloured card stock to match I just took the same ink I used for the little hearts and inked up the banner.  This way it's a perfect match and I used up something from my ever growing stash pile!

I stamped the coffee and donut with SSS intense black ink and coloured them in with my copics.  I used R20 & R22 for the pinks, C1 & 0 for the lid and E23 & E25 for the brown on the donut. I then used the dies to cut them out.  I added the adorable little faces from the Thanks a Bushel set with SSS Chocolate ink and Teeny Bikini inks.  I cut out the Thanks from white card stock and adhered it to the banner die cut.


I'm playing along with the Lawnscaping Challenge - Give Thanks


"Thanks" for stopping by, see you again soon.

I'll be starting my 12 day of Christmas cards soon, so stay tuned!


Coralynn  :)


Supplies:


Tuesday, November 1, 2016

YouTube - 200 Subscriber Giveaway!

Hello everyone,

I am a bit late with this post but I have surpassed my goal of 200 YouTube subscribers!  All thanks to you out there for subscribing. 

To say Thank You, I'm having a little giveaway. 
All you need to do is be a subscriber and leave a comment on this blog post letting me know that you are a subscriber and I will pick a winner from the list of comments. 


You're more than welcome to leave me a comment over on YT but only the comments left here on this post will be eligible for the prize.

This is open to everyone! 

Giveaway is open till November 5, 2016 11:59 EDST, and I will announce the winner November 6, 2016.


Good Luck everyone!
Thanks for stopping by.

Coralynn  :)


Wednesday, October 19, 2016

Happy Halloween!

Hello everyone,

As soon as I saw the newest Lawnscaping Challenge come out, I knew exactly what I was going to do. I took the plunge and I have my first attempt at a galaxy background.  I have to say that more than once this piece almost headed into the garbage can.  But I stuck it out and I'm really pleased with how it turned out.


I took the distress watercolour paper and did like most others who create these backgrounds and added the squeezed lemonade, picked raspberry and seedless preserves and added them in a random pattern on the paper.  Once that was blended in and you don't need to be perfect with this because you'll be covering it with the black soot.  So when it's all done you can only see the purple and the yellow becomes green.  I then added some white gesso I had in my stash and watered it down a bit and took a small pain brush and splattered it all over the panel.  With the distress inks I find the white doesn't stay white so I went over some of the splatters with a white gelly roll pen to brighten them up.

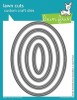
After I was done blending, there was still some left over black soot, so I took a bit of water and sprayed my craft mat and and with another piece of watercolour paper I did some ink smooching to create the moon.  I added some of the same ink colour around the edges once I cut it out with a circle die and adhered it to the card.


I cut out the tree border with LF black card stock and adhered one panel to the galaxy background and then took one of the slide on over dies and cut it out so she's flying to the moon.  I saved the little piece that comes out so I could add it to the card base so it had a cleaner look. I added fun foam to the back of the panel to give it stability and the added my penny to the back and then added foam tape to it and the added the little witch.  

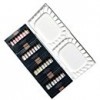
I coloured in the witch with her broom and treat bag in with my copics (picture listed below of the colours) and used a white and silver gelly roll pen on her buckle and dots to her cheeks as well as some white highlights.  


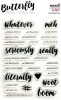
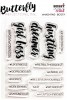
And lastly I added the second tree panel with foam tape to the front of the card and heat embossed the sentiment with white embossing powder.  

Copics used


I'm playing along with the Lawnscaping Challenge. 


UPDATE
October 29, 2016

I am honoured to have been chosen for the Queen of the Green and I couldn't be more excited! 


Thanks for stopping by, see you again soon.

Coralynn  :)

Supplies:
*Copics purchased at my local Michaels.