Showing posts with label stencil. Show all posts

Sunday, April 16, 2017

Happy Birthday - AAA Cards Game 88 - Stencil

Hello everyone,

We are back with a new game with AAA Cards - Stencils.

This is a technique I truly don't use enough but has such an impact.

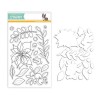
For my card I have been loving this stencil and thought I'd use it again today.  I taped the stencil to the card base with low tack tape and used my coloured pencils to trace around the stencil lines.


I then stamped the sentiment with black ink and called the card done.  It doesn't have to be complicated or a lot of work to look good.


Our wonderful sponsor Stamplorations, is giving away product
specified by Shery, value up to $15 + 10% coupon offer for players so be sure to stop by. 

Prize is $10 gift certificate to the winner. Also, a random drawing for a pack of 3 stencils to one player.


We hope you'll play along with us!


Thanks for stopping by, see you again soon!

Coralynn  :)

Sunday, December 11, 2016

Holiday Card Series - Merry Christmas

Hello everyone,

I have another card for my Holiday Card series.  I used some of the images I coloured during Kathy Racoosin's colouring challenge.  

As soon as I coloured these up, I knew exactly the card I was going to make with them.  And so I did!

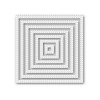
I stamped and coloured in the images with my copics and then I ran them through my die cutting machine and then added them to the panel with foam tape. I then cut out a square panel using white card stock from Recollections using the SSS stitched square dies. 


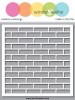
As I put the stencil down onto the paper with from Winnie & Walter, I added it diagonally and then ink blended some Fog ink from Simon Says Stamp.  I then popped it up onto a square card base with fun foam. I am liking that stuff more and more for creating dimension on my cards. Especially since I'm one of those who gets so involved with the card I end up forgetting to stamp the sentiment until the card is put together.  This way even if I forget, there is enough support under the panel that I can still add it to the card without destroying the whole card.  

After that was all done, I die cut the word merry three times out of black card stock from Lawn Fawn with a SSS word. It actually comes all together as Merry Christmas and I just cut off the Christmas part and stamped it instead. Unfortunately it has been so long since I did this card I can't remember which set the Christmas came from.  But there are many stamps set that would work.  


To finish off the card I used a white Signo gel pen and added the little dots and dashes to the flower.  

Thanks for stopping  by, see you again soon!

Coralynn  :)

Supplies:

SaveSave

Sunday, November 9, 2014

OCC Holiday Card Workshop 2014 Day 1, 3 & 5

Hello everyone,
It's sad that the class is now over.  I am now playing catch up from the class as I had the most crazy week ever and wasn't able to post daily so here they are.

Day 1:  Duplicating Cards.

I was inspired by Kristina's card and the ease of making a lot of these.  You just form an assembly line type process and do each step to all cards before moving on to the next.  This one could be done with so many different papers and colour combo's and sky's the limit.
Fist I heat embossed the sentiment with Hero Art white embossing powder and then used the Falling Snow stencil and white embossing paste to do the snow.  I used a little die cut heart from red card stock and covered it with Christmas stickles.  Then I used the red twine to finish off the bottom of the card.


Supplies:

Falling Snow stencil - SSS
Kraft Cardstock - Michaels - Recollections
American Craft red twine - Michaels
Sentiment - November SSS SSCK 2014


Day 3:  Watercolour Cards

I used Peacock Feathers distress ink and Canson watercolour paper to create the background.  I then cut it out with the MFT Stitched rectangle stax dies.  I then cut out the Merry Christmas from SSS and then put it up on a 2.75 x 4.25 card.  I just cut an A2 size card in half and that gives me two smaller cards to use.  I find I have a better time designing cards that are smaller.


Supplies:

Cardstock - Recollections - Michaels
Distress ink - SSS
Die Cut Sentiment - SSS
Marshmallow Sequins - Pretty Pink Posh


Day 5: Gift Tags
Inspired by Debby's card and for this one I don't think I would mass produce it but I love the idea for a few that you know would appreciate the time put into it.  I used Colour shine to splatter on the background and Hero Art Fresh Peach ink for the sentiment.  Paper Smooches snowflakes dies and glued them around the tag.  I then used Pretty Pink Posh sequins to finish the card.  


Supplies:

Cardstock - Recollections / Michaels
Snowflakes Dies - Paper Smooches
Heidi Swapp Colourshine in the Coral - Micheals
Marshmellow sequins - Pretty Pink Posh 
Tag - My Favorite Things - Stitched tags - SSS
Sentiment - Holiday Hellos - SSS


Thursday, September 11, 2014

Hey pumpkin - Card

Hello everyone.

I have a card to share and it's my first Halloween card of the season.   I have to admit as much as I love all the Halloween stamps and decorations we are not much into the holiday.  


I used the SSS hey pumpkin stamp set, distress inks, LF sequins and Copics to color the kitty and pumpkin. I used Versafine onyx fir the sentiment and a Fabre castel PITT artist pen in size M for the lines around the image. I also used some embroidery thread behind the image to add dimension. The stencil is one I found at Michaels in a four pack of 3x3 stencils. The card is 4x4.25  and to finish it off I used Wink if Stella clear glitter pen but unfortunately you can't see it. 

I wanted to let you all know that I may not be posting much in the next few weeks as I have my grandmother who is in palliative care so I'm spending most of my time with her and my family. 

Thanks for stopping by.

Coralynn :)