Showing posts with label ink blending. Show all posts

Friday, January 26, 2018

Two Designers - One Stamp Set for CAS-ual Friday Stamps

Hello everyone,

I am super excited to be joining amazing talented design team member Kimberly (you can see her post here) for a fun collaboration.  Two designers, one stamp set.

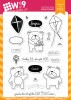
We chose the Shenanigans stamp set, which has the best sayings. We chose to do rainbow colours with sequins and I was having so much fun that I made three cards.

So for my first card added a bit of Spun Sugar to the background and then stamped the sentiment with Versafine Onix Black ink.


I used a background die that cut out vertical strips and I used the negative pieces to make the candle sticks.  I then did some ink blending with a combination of Distress Oxide and regular Distress ink to create the rainbow and then did some water splatters for texture.  I used a leaf die to create the fire on top and ink blended those as well with distress ink. I popped them up with foam tape and added the sequins.  I always have the hardest time adding those.  You'd think I was performing surgery.  LoL!!!


For my second, there were leftovers from the candles and they were just too pretty to through out so I added them to a black background.  I stamped the sentiment with Versamark ink and heat embossed it with white embossing powder.  Then again, did surgery with the sequins.


And for my last card, I had this background sitting on my desk and thought that a more masculine card would work so I stamped the sentiment with Versafine ink and heat embossed it with a black sparkly powder from Ranger. Just because it's a masculine card doesn't mean it can't have a little sparkle so I added a few silver and black gems.


I can't thank Kim enough for thinking of me for this collaboration and to Michelle for being fabulous!

Thanks for stopping by, see you again soon!

Coralynn :)


Wednesday, January 11, 2017

A Blog Named Hero January Challenge

Hello everyone,

I'm here with a sneak peak for the A Blog Named Hero January monthly challenge with stamps from our sponsor, Right at Home.

Hope to see you there!


Sunday, December 11, 2016

Holiday Card Series - Merry Christmas

Hello everyone,

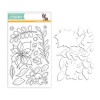
I have another card for my Holiday Card series.  I used some of the images I coloured during Kathy Racoosin's colouring challenge.  

As soon as I coloured these up, I knew exactly the card I was going to make with them.  And so I did!

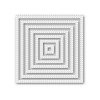
I stamped and coloured in the images with my copics and then I ran them through my die cutting machine and then added them to the panel with foam tape. I then cut out a square panel using white card stock from Recollections using the SSS stitched square dies. 


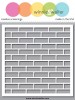
As I put the stencil down onto the paper with from Winnie & Walter, I added it diagonally and then ink blended some Fog ink from Simon Says Stamp.  I then popped it up onto a square card base with fun foam. I am liking that stuff more and more for creating dimension on my cards. Especially since I'm one of those who gets so involved with the card I end up forgetting to stamp the sentiment until the card is put together.  This way even if I forget, there is enough support under the panel that I can still add it to the card without destroying the whole card.  

After that was all done, I die cut the word merry three times out of black card stock from Lawn Fawn with a SSS word. It actually comes all together as Merry Christmas and I just cut off the Christmas part and stamped it instead. Unfortunately it has been so long since I did this card I can't remember which set the Christmas came from.  But there are many stamps set that would work.  


To finish off the card I used a white Signo gel pen and added the little dots and dashes to the flower.  

Thanks for stopping  by, see you again soon!

Coralynn  :)

Supplies:

SaveSave

Saturday, October 15, 2016

Feel Better Soon - Card and Video

Hello everyone,

I had this idea in my head but wasn't sure how it was going to turn out so I turned on the camera.

I started out with the archival ink cubes that came in the SSS Nuts About You October card kit and added a bit of ink blending to the middle of an A2 sized card. Then I cut out a frame from the MFT single stitched frame dies and cut it out from white card stock and popped it up on foam tape to the card base.

I die cut the banner from the SSS basic banner dies and did some partial die cutting to have the flag ends and I used my mini MISTI to place and stamp the sentiment.  I popped it up on foam tape to the card base.


I stamped and colouring in the sweet elephant from SSS with SSS intense black and my copics.  I added the dot details to his nose and the top of his head.  When you watch the video, you'll notice that this was not included as it was an afterthought. I popped him up on foam tape as well and added him to the card.  I took the Nuvo Crystal drops from the SSS October card kit as they matched the Ranger ink perfectly, and added them to the card.  


I can't thank you all enough for your support with my YouTube channel and I am almost at 200 subscribers!  As soon as I hit that mark I'll have a small giveaway.  Stay tuned!


Thanks so much for stopping by, see you again soon.

Coralynn  :)

Supplies:


Tuesday, October 11, 2016

INTRODUCTION - Snarky Birthday Sentiment Stamp Set

Hello there! 

I'm here to introduce our new Snarky Birthday Sentiments stamp set.  I absolutely love these sayings.

For my card I used one of our new stencils (*sneak peak) and added willow coloured dye ink using a blending tool to an A2 sized card panel.  
I had this little fella sitting on my desk from a previous project and he was just hoping to be put on a card...so I did!  


I used a banner die to cut out olive card stock and added the sentiment with black ink.  I took the panel and used a rectangle die of the same size and cut it out adding it to the card base.  I then added the banner with liquid adhesive so I could move it around to make sure it was straight. Once that was done I added the little owl with foam tape and called it a day.


Snarky Birthday Sentiment 


Thanks for joining us and stay tuned for more new products tomorrow.  You'll love what's coming!

Coralynn  :)


Wednesday, September 21, 2016

Thank You card - WPlus9

Hello everyone,

I'm back with a couple of cards and a video!

I had already created this card for my co-worker and loved it so much I wanted to create a couple more.


I took a circle die and cut out the circle from white card stock.  I then cut out the clouds and grass from which card stock to create stencils and then ink blended in the sky and grass with Willow and Cloudy Sky inks from Simon Says Stamp.  I messed up the one of the right but thought I'd leave it in as the struggle is real sometimes.


I used the WPlus9 Friends for all Season - Summer and that little puppy is just adorable.  I stamped the images with SSS Intense black ink on card stock and coloured them in with my copics.  I then die cut them and popped it up on foam tape onto the circle.  I then added the circle to the card base with foam tape as well.


Here's my video on YouTube. 


Thanks for stopping by, see you again soon.

Coralynn  :)


Supplies:


Saturday, September 3, 2016

Sweet Birthday!

Hello everyone!

I'm back with card project for you today.  

I got the thought of doing a waffle background and started thinking of how to do it.  A grid stencil will work but for me the lines were too weren't thick enough so I thought of using a very thin washi tape.  I am super excited with how it turned out.  I've added a picture of the background before I removed all the tape.  

I used the Ice Cream, You scream stamp set.  This is an older set but still a great one to have in your stash.  I love how the sentiments have two different fonts.  I stamped the images on to heavy card stock with black ink and coloured them in with my copics and added glossy accents to the ice cream.  cut out a banner from black card stock andI then heat embossed the sentiment with white embossing power.  I adhered the banner to the front panel and then the ice cream cone and popsicle to the banner.


For the main image I wanted to do my favourite flavour which is Orange Pineapple so I coloured it in best I could. I recently purchase action wobbles and wanted to use them on this card so I added to the image and then to the card.


Here is a picture of the background and how I created it.  I used two different brown inks to give it dimension and then removed the washi tape and used a rectangle die to cut it out.


Thanks for stopping by, see you again soon.

Coralynn  :)