Friday, September 9, 2016

Kindness - Technique Share


Hello everyone,

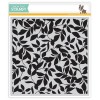
As I was ooogaling my crafty goodies I stopped at the leaves background stamp from SSS a thought came to me.  I wonder what it would do if I pushed this stamp into embossing paste. Well with a few fails and a few wins, this is what came about.


I took some white embossing paste and added spiced marmalade, fossilized amber and ripped persimmon to each little blob I added to me craft sheet.  After blending them in, I took a palette knife and smeared it onto a piece of card stock.  


I found out that the surface needs to be dry to the touch before this will work. So I did use me heat gun to help it as long as you don't keep it in one spot so that it doesn't bubble up and dry the paste underneath. Once you can touch it without getting any on your finger, go ahead and add the stamp to the card piece. You can use your fist to rub it in or a brayer or what ever else you would like. As you can see that in some spots were too thin and dried and some spots were too think and didn't leave enough definition but then there are the perfect spots that make you go "Cooooo!"


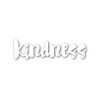
I rinsed the stamp under water and used an old toothbrush to clean out the little crevices that you can't get with just wiping. I then let the piece air dry before running it through my Big Shot with the SSS basic rectangle dies.  I added some fun foam under it to pop it up because it was a bit wonky and added a couple of gold/amber gems.  The sentiment is the Painted Kindness die and I used the negative piece, cut it evenly into a rectangle and used foam tape and added some liquid glue to help it stick to the embossing paste and added it to the card.


This isn't perfected but it was fun trying it out and I think the results are pretty good. I also did it with just white embossing paste as well and that one turned out great!


Adding my cards to the SSS Wednesday Challenge.

Simon Says Stamp Wednesday Challenge Blog


Thanks so much for stopping by, see you again soon!

Coralynn  :)

Supplies:

Saturday, September 3, 2016

Sweet Birthday!

Hello everyone!

I'm back with card project for you today.  

I got the thought of doing a waffle background and started thinking of how to do it.  A grid stencil will work but for me the lines were too weren't thick enough so I thought of using a very thin washi tape.  I am super excited with how it turned out.  I've added a picture of the background before I removed all the tape.  

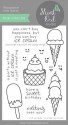
I used the Ice Cream, You scream stamp set.  This is an older set but still a great one to have in your stash.  I love how the sentiments have two different fonts.  I stamped the images on to heavy card stock with black ink and coloured them in with my copics and added glossy accents to the ice cream.  cut out a banner from black card stock andI then heat embossed the sentiment with white embossing power.  I adhered the banner to the front panel and then the ice cream cone and popsicle to the banner.


For the main image I wanted to do my favourite flavour which is Orange Pineapple so I coloured it in best I could. I recently purchase action wobbles and wanted to use them on this card so I added to the image and then to the card.


Here is a picture of the background and how I created it.  I used two different brown inks to give it dimension and then removed the washi tape and used a rectangle die to cut it out.


Thanks for stopping by, see you again soon.

Coralynn  :)

Saturday, August 27, 2016

Mint Owl Studio - Happy Birthday

 Hello everyone,

I'm back today with a birthday card.  I alway run out of this is the type of card so I make these the most.

I used our new Birthday Bash stamp set and created a background with the bow stamp from the set. I then used our new gift box die and cut it out of red card stock and some patterned paper.


I popped up the gift box with fun foam and adhered it to a piece of vellum that I cut out with a rectangle die.  I then added liquid glue to the back where the gift box is so that you don't see it through the vellum.  I added the sentiment with back ink and heat set it because it takes a very long time to dry and I don't have that much time.  


I added a few sequins from the Peach Passion sequins mix and called this card done!

Thanks for joining me today and I'll be back soon.

Coralynn :)


Friday, August 19, 2016

Mint Owl Studio - August Release Day Blog Hop!!!

Hello everyone,

Welcome to our release day blog hop!  For this release, we have something exciting to share with you.  We now have dies!  There are two die sets for this month and I think you'll love them.  


I used the Birthday Bash stamp set today and I just love these balloons.  They take up most of a card front so you can create lost of great clean and simple cards as I did today.  

I die cut the front panel from a rectangle die and stamped the image with Versamark ink and heat embossed with white embossing powder.  


I then took my watercolour paints and coloured them in rainbow order.  I challenged myself to go for a loose watercolour as I don't.  I like staying in my comfort zone and that is inside the lines!

I took a piece of vellum and heat embossed the sentiments in white and black embossing power and adhered it to the panel and the the panel to the base.


Hop Order:
Coralynn - you are here!

The design team is amazing and has lots of wonderful inspiration for you and we hope it inspires you to head over to the Mint Owl Studio store and shop, shop. shop! So now it's time to hop, hop, hop along!

Coralynn  :)

Wednesday, August 17, 2016

Intro to Party Pals and Banner Sentiment

Hello everyone,

I am back and excited to introduce two more sets from our August release.  Here are the two sets that I used for my card and a little sneak peak of a brand new die set that you will see tomorrow. 


For my card today I decided to use an ivory card stock for the base and front panel. I die cut the front panel and popped it up on foam tape and added it to the base.  I die cut the little banner flags from watercolour card stock so it would match the card base.  


I used the adorable party hats from the Party Pals set and the sentiment from the Banner Sentiments set and heat embossed them with white embossing power.  I then took my Zig Clean Colour markers and added colour in rainbow order, which goes along with our August Instagram Challenge - Rainbow. I popped the banners up on foam tape and added them to the middle of the card.  


 That's it for me.  Thanks for stopping by and see you again soon!

Coralynn  :)

Tuesday, August 16, 2016

Tic-Tack-Toe Challenge Sixteen

Hello everyone,

Today I am here with my very last post for the Stamping Smiles Designs - Tic-Tac-Toe challenge.
I can not thank Ka enough for the wonderful opportunity of being with such a great team with amazing designers.  Enough with the mushy stuff, let's get to my card for this challenge.


My choice for today's challenge is:
Hexagons/Misting/Birthday

I used the MFT chicken wire cover up die and cut it out of white card stock. I then added Glad press and seal to the back so that all the little pieces would stay together and I took the inks and blended them from dark to light. 


I took the colour shine and spritzed it once onto the panel.  I then took away the positive part and used the negative pieces.  I added foam tape pieces to each hexagon (yeah, worth it but not fun) and then added it to a card base.  I then took some navy card stock from my stash and cut out the happy birthday die and adhered it to the hexagons.


Thanks for stopping by, see you again soon!

Coralynn  :)

Supplies:

Monday, August 15, 2016

Butterfly Reflections Ink & Mint Owl Studio Haul and Video

Hello everyone,

I received my Butterfly Reflections Ink and Mint Owl Studio orders today while I was at work.  I couldn't get into them fast enough when I got home.  My daughter, who you'll see in the video again, was waiting for me in my craft room waiting to do a haul video. I think I've created a monster!  But it makes me happy that she wants to share this with me.

I'm trying to do more videos so I hope to have some cards up with the crafty goodies from my last haul and this one soon.  Stay tuned!

Here is a picture of my goodies and a video is below.


You can watch the video below or click here.  


Thanks for stopping by, see you again soon!
Coralynn :)
Supplies: