Showing posts with label embossing paste. Show all posts

Tuesday, September 13, 2016

Lawnscaping Challenge - #137

Hello everyone,

It's been a long time since I played along with the Lawnscaping Challenges and this one was too good to pass up. It's a texture challenge and I was able to play with my new LF goodies and here is the card I came up with.  


On to my card.

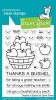
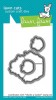
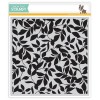
I started by stamping out the apples in the basket image and instead of stamping the image onto a post it note, I used the coordinating die cut instead.  This way when I mask off the image it will leave the little border around it.  I added the grid stencil to the panel and then mixed up the translucent embossing paste with the Rusty Hinge distress ink.

After I removed the stencil and cleaned it and my craft surface off I allowed the paste to dry...yeah right, who am I kidding.  I didn't have the patience to wait so I was very careful when I coloured in the basket of applies with my Zig Clean Color Real Brush markers.


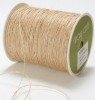
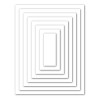
I cut out the front panel with the basic rectangle dies from SSS, added some natural twin from May Arts and popped it up with foam tape to a piece of rust coloured card stock from my local craft store.  I then die cut and added the LF scripty thanks die on top of the twine with liquid glue and finished of the card with some orange gems and added it all to an A2 sized card base.


That's it for me.  Thanks for stopping by, see you again soon.

Coralynn  :)


Supplies:


Friday, September 9, 2016

Kindness - Technique Share


Hello everyone,

As I was ooogaling my crafty goodies I stopped at the leaves background stamp from SSS a thought came to me.  I wonder what it would do if I pushed this stamp into embossing paste. Well with a few fails and a few wins, this is what came about.


I took some white embossing paste and added spiced marmalade, fossilized amber and ripped persimmon to each little blob I added to me craft sheet.  After blending them in, I took a palette knife and smeared it onto a piece of card stock.  


I found out that the surface needs to be dry to the touch before this will work. So I did use me heat gun to help it as long as you don't keep it in one spot so that it doesn't bubble up and dry the paste underneath. Once you can touch it without getting any on your finger, go ahead and add the stamp to the card piece. You can use your fist to rub it in or a brayer or what ever else you would like. As you can see that in some spots were too thin and dried and some spots were too think and didn't leave enough definition but then there are the perfect spots that make you go "Cooooo!"


I rinsed the stamp under water and used an old toothbrush to clean out the little crevices that you can't get with just wiping. I then let the piece air dry before running it through my Big Shot with the SSS basic rectangle dies.  I added some fun foam under it to pop it up because it was a bit wonky and added a couple of gold/amber gems.  The sentiment is the Painted Kindness die and I used the negative piece, cut it evenly into a rectangle and used foam tape and added some liquid glue to help it stick to the embossing paste and added it to the card.


This isn't perfected but it was fun trying it out and I think the results are pretty good. I also did it with just white embossing paste as well and that one turned out great!


Adding my cards to the SSS Wednesday Challenge.

Simon Says Stamp Wednesday Challenge Blog


Thanks so much for stopping by, see you again soon!

Coralynn  :)

Supplies:


Thursday, September 4, 2014

Lawn Fawn - Thinking of you Card


Hello everyone,

Here is a card I made with the Lawn Fawn "Friendship Grows" stamp set.  I stamped the image with Ranger Archival ink and coloured in the sunflower with distress inks.   I used embossing paste and coloured it with distress ink and then I used Tim Holtz Honeycomb stencil for the background.  

         I used the Mama Elephant Femme Frames stitched rectangle die to cut it out the panel.  I then cut out a piece of vellum and sewed it on the top and bottom of my panel.  I mounted that onto a piece of mustard colour card stock that came with an old SSS CK and I'm sorry but I don't have the colour anymore.  I then mounted all of that onto my card base which is Recollections 110# card stock.  I used the Lawn Ornaments sequins that came from another CK but they are no longer listed on the SSS website.  I also used Pretty Pink Posh 6mm Crystal Clear sequins as well.

         I then stamped the sentiment with Memento tuxedo black ink from the "In my Heart" stamp set, which is SO adorable!


Thanks for stopping by!

See you again soon.

Coralynn :)

Wednesday, August 6, 2014

Camp Scrap 2014


Hey again!

Here is something I did up last week for camp.   May had given us some guidelines but I found myself focusing on the requirements, 1,2,3,4 of any combination such as 1 stamp, 2 colours, 3 embellishments and so on.  I was so worried about getting the numbers right that I kind of through that to the side and just finished my project.  I did get some of the numbers on there but I'm not sure what they would be!


I like where this was going and I may try some of the elements on this canvas on a new project in the future.  I used cotton twine, a button, embossing paste, chipboard hearts and some stickers (bottom left corner) that came in one of my SSS card kits from last year.  I used Ranger cranberry alcohol ink and I did five spots of that colour.  I also layers some die cuts from a previous project and then covered it all with Gesso (Artist Loft - Michaels)  

Thanks for stopping by!
See you soon,
Coralynn :)


Saturday, July 12, 2014

Camp Scrap 2014 Workshop Winner! That would be me!


Hello everyone!

I'm back with a long overdue post.  A few weeks ago SSS had a chance to win Twitter, all 4 Classes offered in the Camp Scrap 2014 workshop by the talented May Flaum.  So I "Tweeted for a chance to win" and guess what?????  I won!  A BIG THANKS to Simon Says Stamp!

I have to admit that I wasn't sure about the class as I had never even attempted mixed media and wasn't sure if it was something I was going to enjoy.  Well let me tell you...I am having a wonderful and fun time exploring this new medium.  It's allowing me to just "go with it".

May is so talented and has such creativity that it's making me "let loose" with my creativity and I think this is something that I will keep doing even after class.

Click on the blog candy below for the giveaway post (this is the only one I could find but it's not the one I won on)


Click the link below to see what is happening in Camp!  It's worth it.  You don't have to purchase all four classes but they are ALL very interesting. 


Now for my Week 1 project.  This is my VERY first mixed media project!


Supplies:
Acrylic paint (Michaels Craftsmart brand)
Embellishements (from numerous SSS CKOM)
Lawn Fawn Into the woods sequins
Tim Holtz stencil (Michaels)
5x7 canvas (Michaels)

I had to get supplies quickly as I found out that I won on the day the camp started.


I will see you again soon!
Thanks for stopping by.


Coralynn  :)