Wednesday, September 21, 2016

Thank You card - WPlus9

Hello everyone,

I'm back with a couple of cards and a video!

I had already created this card for my co-worker and loved it so much I wanted to create a couple more.


I took a circle die and cut out the circle from white card stock.  I then cut out the clouds and grass from which card stock to create stencils and then ink blended in the sky and grass with Willow and Cloudy Sky inks from Simon Says Stamp.  I messed up the one of the right but thought I'd leave it in as the struggle is real sometimes.


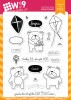
I used the WPlus9 Friends for all Season - Summer and that little puppy is just adorable.  I stamped the images with SSS Intense black ink on card stock and coloured them in with my copics.  I then die cut them and popped it up on foam tape onto the circle.  I then added the circle to the card base with foam tape as well.


Here's my video on YouTube. 


Thanks for stopping by, see you again soon.

Coralynn  :)


Supplies:


Saturday, September 17, 2016

New Release card share.

Hello everyone!

I'm back with another card with this months release which is available today in the shop. 

For my card I used the "Away in a Manger" stamp set along with the "Christmas Quilt" stencil.  I used what I'm calling the reverse stencil technique with I did with my previous card.  This was the second stamping to use up the ink left of the stencil. I then took some watercolour paints and coloured in the background.  


I used a circle from my stash along with a banner die cut from black card stock. I heat embossed the sentiment with white embossing powder and adhered it to the front panel. I then coloured and fussy cut Baby Jesus and popped it up with foam tape.  To finish off the card I added some Sparkle pen to the watercolour panel but you can't see it in these pictures.


We hope you'll head over to the shop to treat yourself with a few, or the entire release for this month!

Thanks for stopping by, see you again soon.

Coralynn  :)


Friday, September 16, 2016

Release Day Blog Hop - September

Hello everyone,

We are showcasing our newest release and it's beginning to look a lot like Christmas!!!!


Stay tuned to find out how you can get a chance to win the entire new release!  

Here is my card for the hop.  I used the Christmas Quilt stencil and I did something a bit different.  I used it in the opposite way as normal.  I used all the ink that was left on the stencil after I worked on another background and heat embossed it with white embossing powder.  I then ink blended with three different SSS inks for the gradient look.  


I then added the panel to a piece of black card stock and adhered it to the card base.  I heat embossed the sentiment from the Trim the Tree stamp set on black card stock and adhered it to the front panel with my tape runner.


Hop Order:
Coralynn - you are here!

Are you ready to see how you can get a chance to win all these goodies?  All you have to do is comment on this blog and each of the blogs on the hop.  The winner will be randomly chosen from one of the blogs, so the more blogs you comment on, the better your chance is to win!  

Thanks for stopping by, see you again soon.

Coralynn  :)


Tuesday, September 13, 2016

Lawnscaping Challenge - #137

Hello everyone,

It's been a long time since I played along with the Lawnscaping Challenges and this one was too good to pass up. It's a texture challenge and I was able to play with my new LF goodies and here is the card I came up with.  


On to my card.

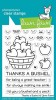
I started by stamping out the apples in the basket image and instead of stamping the image onto a post it note, I used the coordinating die cut instead.  This way when I mask off the image it will leave the little border around it.  I added the grid stencil to the panel and then mixed up the translucent embossing paste with the Rusty Hinge distress ink.

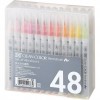
After I removed the stencil and cleaned it and my craft surface off I allowed the paste to dry...yeah right, who am I kidding.  I didn't have the patience to wait so I was very careful when I coloured in the basket of applies with my Zig Clean Color Real Brush markers.


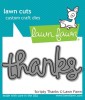
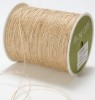
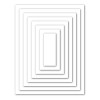
I cut out the front panel with the basic rectangle dies from SSS, added some natural twin from May Arts and popped it up with foam tape to a piece of rust coloured card stock from my local craft store.  I then die cut and added the LF scripty thanks die on top of the twine with liquid glue and finished of the card with some orange gems and added it all to an A2 sized card base.


That's it for me.  Thanks for stopping by, see you again soon.

Coralynn  :)


Supplies:


Sunday, September 11, 2016

AAA Cards Game #73 - Upcycling

Hello everyone,

We are back with a new game for AAA Cards.  Upcycling! 


This can be anything that you've not purposely bought for crafting, e.g. a clothes tag, a label, part of a paper bag, a magazine picture or any other idea you have.

Picture

$20 Gift Certificate


Guest Designer - Angie Cimbalo from Cimbacreativefun 


Now on to my card.  I will admit that I struggled with this challenge. They don't all come easy but it was still fun to think outside the box on what I had in the house that I could use on my card.  

I was sitting at my desk one day just looking around my craft room and I spotted some file folders that were on the very top shelf that I had for an old filing cabinet. The light bulb went on and this is what came out of that crafty session.  


for the front panel I used embossing paste and added it to the white panel and let it dry to the touch. I then took the SSS leaves background stamp and pushed it into the paste and it left an impression of the stamp. I then let it dry for a few days (only because I was trying to figure out what to do with it) and the cut it out.

I used the SSS basic rectangle dies for both panels and I added fun foam to the front panel to pop it up because the pasted warped the paper so it helped keep it flat. I then used the Happy from the Painted Happy Birthday die set and used the negative part for the sentiment along with the Birthday from the MFT Label Maker stamp set an stamped it in black ink.  


Thanks for stopping by and be sure to head over to the blog and link up your CAS cards. We always love to see what you create.

Coralynn  :)


Supplies:


Saturday, September 10, 2016

Mint Owl Studio - Another Year Wiser...and Older!

Hello everyone,

I'm back with a card I created with this adorable Outrageous Owls stamp set.

I started out with the negative pieces from a background die that cut out vertical stripes so I thought I would put them to good use. I took some warm grey inks and blending them from dark to light then I adhered them to the card base.


I coloured in the cool owl and branch with warm grey copics and my new favourite combo (E40, E43, E44 & E49) and he looked like he needed googley eyes so on they went.  I coloured in the heart with R11.


I cut out a circle from a circle die and added the sentiment with Versamark Onyx black ink and added clear embossing powder.  I then added on the owl and branch to the circle and then added tiny dots of glue strategically placed behind the sentiment and images. To finish off the card I added a few grey gems and added some sparkle to the heart on the branch.


Thanks for stopping by, see you again soon!

Coralynn  :)