Saturday, December 3, 2016

Holiday Greetings


Hello everyone,

I'm back with another holiday card and it was pretty easy to put together.  This would be a good one to mass produce.

I used the reindeer from the Deer Santa stamp set and I just stamped out his head and coloured him in with my copics.  I then fussy cut him out and went around the edges with a black marker to them up.


 I then cut out the circle in the middle of the card and after I used a triangle die to cut out the panel.  I then used a piece of grey kraft card stock cut out another panel with the scalloped rectangle and added it to an A2 sized card base. I cut out a little piece of patterned paper and added it behind the circle.  I then popped up the front panel with fun foam and added foam tape to the reindeer.  And as usual I forgot to stamp my sentiment.  So luckily I used fun foam so it stamped nicely.  I used the Cardinal Greetings stamp set with black ink.


To finish off the card I added some sequins from the Mint Owl Mix.

Thanks for stopping by, see you again soon!

Coralynn  :)


Wednesday, November 30, 2016

Holiday Card Series

Hello everyone,

I am starting my Holiday Card Series and I'm having fun making all these cards with the wonderful crafty goodies.

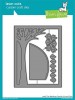
For today's card I started out with the Leafy Tree die from Lawn Fawn and I cut it out twice with white card stock.  With one I did some ink blending with stormy sky distress ink and then when I was happy with that I inlaid the negative pieces into the other die cut.  


There is a die that is used to make it look like the leaves on the tree but turn it upside down and it looks like a hill. So that's what I did.

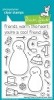
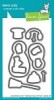
I took the Making Frosty Friends stamps and dies and I coloured them in with my copics.  Unfortunately I lost the list I had written of the colours I used :(

I stamped the sentiment with Hero Arts black ink and added the falling snow with my white gel pen.


To finish off the card I took the Marvy appliqué pen and added snow all around the card and I added a little white gel pen to the images for interest. 

Thanks for stopping by, see you again soon!

Coralynn  :)

Supplies:


Sunday, November 27, 2016

Welcome to the Family - Studio Katia November 2016 Release

Hello everyone,

I'm very excited and honoured to be joining Studio Katia for their November Release which is now in the shop.  Here is just one of the cards that I've created with this amazing release.

I wanted to create a shaker card because there are so many pretty sequins I wanted to show them off.  I started by cutting out an A2 sized card panel and used a same sized rectangle die to clean up the edges.  I then took the elongated octagon dies and cut out a frame, which I set aside for another project.  I added a piece of acetate to the back of the panel and then added the middle octagon to the front so it would have something to adhere to.  I then added foam tape to the back to create my shaker.


I stamped the sentiment with Hero Arts black die ink. I then stamped the adorable fox and two hearts with Versamark ink and heat embossed it with orange embossing powder and the fussy cut them out. 


I added the shaker part to the card base and made sure it opened the right way (yes, that has happened more times then I care to admit). I added the fox and hearts to the card as well as a few of the same sequins that are inside the shaker.


Thanks for stopping by, see you again soon.

Coralynn  :)

Supplies:


 Here are all the links to the entire release.

Stamps:

4x6 Foxes 

4x6 Birthday Lions

4x6 Sweet Heart Candy

Creative Dies

Dotted Balloons

Elongated Dotted Hexagons 

Darling Ribbon & Dotted Frames


Sequins

Majestic - Fusion

Lipstick Red - Fusion

Foxy - Fusion

Vintage Sheer - Fusion 

Crystal Clear - Fusion


Flowers 

Crystal Clear


Iridescent Persian Blue

Fairy Princess


Embellishments
Hearts 


Saturday, November 26, 2016

Merry Christmas Tag

Hello everyone,

Happy "day after" Thanksgiving!  I hope you were able to get lots of turkey and time with family.

I have a tag to share with you today.  As nice as it is to have a card for each give, sometimes it's fun to add a special tag instead.  

I started out with stitched tag stax from MFT and cut out the first panel from Neenah desert storm card stock and then another tag the next size up from green card stock from my stash. 


I used the pine branch from the Cardinal Greetings stamp set and stamped it with green ink with first and second generation stamping to give it some depth.  I added the berries with versamark ink and heat embossed them with red embossing powder.  I did the same thing with the sentiment.  

I added the smaller tag to the bigger one with foam tape and as usual I forgot to add the hole at the top for the twine.  So I did this very carefully and added it with my crop-o-dile and added some Lawn Fawn lawn trimmings in gold.  You can finish off the tag by adding a TO and FROM to the back. 


Thanks for stopping by, see you again soon!

Coralynn  :)

Monday, November 21, 2016

Thanks!

 Hello everyone,

Update:  I'm very excited and honoured to say that I was chosen "Top Mow-It-All" for this challenge!


I'm here with a thank you card for you today.  I absolutely love this set by Lawn Fawn and I think it's one of my most used.

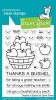
I started with a white card stock panel and used a chevron embossing folder and ran that through my die cutting machine.  I then took the stitched oval dies from LF and cut it out of an ivory piece of card stock an with the sweet little faces from the Thanks a bushel set, stamped them all over the panel with SSS chocolate ink.  I stamped the little heart with SSS Teeny Bikini ink.


I had this banner die cut in my stash (I can't remember who it's from, sorry!) and it fit perfect, so instead of trying to find a coloured card stock to match I just took the same ink I used for the little hearts and inked up the banner.  This way it's a perfect match and I used up something from my ever growing stash pile!

I stamped the coffee and donut with SSS intense black ink and coloured them in with my copics.  I used R20 & R22 for the pinks, C1 & 0 for the lid and E23 & E25 for the brown on the donut. I then used the dies to cut them out.  I added the adorable little faces from the Thanks a Bushel set with SSS Chocolate ink and Teeny Bikini inks.  I cut out the Thanks from white card stock and adhered it to the banner die cut.


I'm playing along with the Lawnscaping Challenge - Give Thanks


"Thanks" for stopping by, see you again soon.

I'll be starting my 12 day of Christmas cards soon, so stay tuned!


Coralynn  :)


Supplies:


Mint Owl Studio - Card and Video

Hello everyone,

I finally got the chance to post his video of a couple belated birthday cards I made with some products from Mint Owl Studio.

I try and link to as many items as I can but some items are purchased at my local craft and art stores and links just don't function well in Canada.  These are not one of a kind items and can be purchased and any craft store.


Thanks for stopping by, see you again soon.

Coralynn  :)

Supplies: