Saturday, October 15, 2016

Feel Better Soon - Card and Video

Hello everyone,

I had this idea in my head but wasn't sure how it was going to turn out so I turned on the camera.

I started out with the archival ink cubes that came in the SSS Nuts About You October card kit and added a bit of ink blending to the middle of an A2 sized card. Then I cut out a frame from the MFT single stitched frame dies and cut it out from white card stock and popped it up on foam tape to the card base.

I die cut the banner from the SSS basic banner dies and did some partial die cutting to have the flag ends and I used my mini MISTI to place and stamp the sentiment.  I popped it up on foam tape to the card base.


I stamped and colouring in the sweet elephant from SSS with SSS intense black and my copics.  I added the dot details to his nose and the top of his head.  When you watch the video, you'll notice that this was not included as it was an afterthought. I popped him up on foam tape as well and added him to the card.  I took the Nuvo Crystal drops from the SSS October card kit as they matched the Ranger ink perfectly, and added them to the card.  


I can't thank you all enough for your support with my YouTube channel and I am almost at 200 subscribers!  As soon as I hit that mark I'll have a small giveaway.  Stay tuned!


Thanks so much for stopping by, see you again soon.

Coralynn  :)

Supplies:

Friday, October 14, 2016

Mint Owl Studio - October Release Blog Hop


Hello everyone,

We are super excited for this month's release.  Hope you'll hop along with us for a chance to win the entire release!  See end of post for more details.

Now on to my card.  I started with the cardinal and coloured him in with my copics.  I ended up looking them up online to see their colours.  I fussy cut him out and added black marker around the edges to clean them up and the set him aside.


With an A2 sized card panel, I stamped the pine bough in the bottom lefthand corner with great ink and with second and third generation stamping to give some dimension to the card.  I had such a fun time that I added more in the top right hand corner.

I then took the panel and used two stitched rectangle dies, one the same size and the other two sizes down and ran them both through my die cutting machine. I added them to the card base and popped up the middle panel with foam tape.


I added some glitter to the pine needles so it would look like there is frost and snow on them and added a few red sequins from my stash.  


We're also giving away the entire new stamp release!  Want to know how to win?  All you have to do is comment on this blog and each of the blogs on the hop.  The winner will be randomly chosen from one of the blogs, so the more blogs you comment on, the better your chance is to win!  Good luck!


Hop Order:


Thanks for stopping by, see you again soon.

Coralynn  :)


Tuesday, October 11, 2016

INTRODUCTION - Snarky Birthday Sentiment Stamp Set

Hello there! 

I'm here to introduce our new Snarky Birthday Sentiments stamp set.  I absolutely love these sayings.

For my card I used one of our new stencils (*sneak peak) and added willow coloured dye ink using a blending tool to an A2 sized card panel.  
I had this little fella sitting on my desk from a previous project and he was just hoping to be put on a card...so I did!  


I used a banner die to cut out olive card stock and added the sentiment with black ink.  I took the panel and used a rectangle die of the same size and cut it out adding it to the card base.  I then added the banner with liquid adhesive so I could move it around to make sure it was straight. Once that was done I added the little owl with foam tape and called it a day.


Snarky Birthday Sentiment 


Thanks for joining us and stay tuned for more new products tomorrow.  You'll love what's coming!

Coralynn  :)


Sunday, October 9, 2016

AAA Cards Game 75 - Photo Inspiration

Hello everyone,

I'm back with a fun card for our newest challenge over a AAA Cards and it's a photo inspiration (see end of post for more details and photo). This is a fun one as I love rainbows and colour.

I stamped the leaf image from Create a Smile a few times with my mini MISTI so I could get a good impression. I went through my copic stash and found two colours per colour family and started colouring in the leaves.


Once I had them all coloured in I fussy cut them out with my scissors and went around the edges with a Memento marker to give it a cleaner look. I then cut out a vase and thanks from MFT and then went to town with the sparkle.  I added it to just about everything on this card. I know, I have a problem but it looked much better with it.  


Be sure to head over to the blog to see what the other DT members have done.  The details on how to play and a linky to add your card is over on the blog. 


Our super duper sponsor for this game is Happy Little Stamper and we couldn't be more excited.


Picture

$20 Gift Certificate

See you again soon.

Coralynn  :)


Saturday, October 8, 2016

Mint Owl Studio - A party without ice cream...

 Hi everyone,

I'm back with a yummy card for you today.  As much as I love fall and fall cards I also love ice cream and thought I would make a card with the Sweet Treats stamp set and Sprinkles stencil.


I started out with a piece of white card stock and added three colours to some embossing paste.  I used the Sprinkles stencil and added each colour diagonally across the panel. I set that aside to dry.


I then stamped the candy with black copic safe ink and coloured them in and fussy cut them leaving a very small white border.  Mainly because I need to practice my fussy cutting and can never get a nice even edge.  But that's just our little secret.  ;)


I cut out two circles from vellum and on the smaller one I stamped and heat embossed the sentiment with cracks me up.  I cut down the embossed panel and added the circles and popped up the candy with foam tape.

That's it for me.  Hope you get some crafty time this weekend!

See you again soon.

Coralynn  :)


Sunday, September 25, 2016

AAA Card Challenge Game #74 - Masking

Hello everyone!

We are back with a new AAA Cards game for you and it's Masking.


This is always a fun technique but I sometimes forget about it.  Fall is upon us and it is my absolute favourite time of year.  

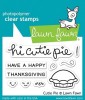
For my card today I wanted to use the adorable Lawn Fawn mini set.  To start I took a piece of post it note and die cut with the scalloped circle die to create a mask.  I then added the negative piece to my card and ink blended the area with Willow ink.  


I took the sentiment and used my Mini MISTI to stamp the sentiment. I like using the MISTI when I stamp sentiments because I normally can't get anything straight even if I try and the die inks look best if you stamp them a couple of times. I then stamped and coloured in the apple pie with my copics and die cut with my Big Shot machine. I then added the little swirl over the pie and added the pie to the card with foam tape.


I have a video up on my YouTube channel.


Thanks for stopping by, see you again soon!

Coralynn  :)


Supplies:

Saturday, September 24, 2016

Mint Owl Studio - Merry Christmas

Hello everyone,

I'm back with another Christmas card for you using the Trim the Tree stamp set.  And did you know we now have coordinating dies as well?

I started out with a pice of watercolour paper and I added a couple of different blues to the card with my watercolour paints.  I did this in layers and heat set each layer before adding more colour.  I happen to love the harsher lines this technique gives.


I then stamped the ornaments in Versamark and heat embossed it with silver embossing powder.  I then took my Versamark pen and added the lines that the ornaments are hanging from and heat embossed them again along with the sentiment.

I then added a few dots using the Nuvo drops in glitter and let that dry before adhering the panel onto a card base.  I always manage to stick my finger in these dots thinking they are dry enough, and they never are.  But this time I put the card up so I wouldn't keep checking on them.  ;)


Thanks for stopping by, see you again soon!

Coralynn  :)


Friday, September 23, 2016

Fall Coffee Lovers Blog Hop

Hello everyone,

I can't believe the Coffee Lovers Bloghop is back again already!  I love this hop!  It's fun and I love seeing all the amazing cards being created with coffee, tea or hot chocolate.


I coloured in the images during Kathy Racoosin's last Colour Challenge and as soon as I had them coloured I knew exactly how I was going to use them.

I saved this card for the last two months as I wanted to save it just for today, for this hop.  I used the Perked Up stamps and dies from The Greeting Farm and coloured them in with my copics.
I then cut out a panel from the MFT rounded rectangle dies and used the Mint Owl Studio coffee bean stencil with some Espresso distress ink and added it to the die cut panel.


I stamped the sentiment that came with the set to the panel with Versafine onyx black ink.  Popped up the coffee with foam tape to the panel and then popped that up onto the card base.  I added some coffee coloured sequins from Mint Owl Studio to finish off the card.  


Hope you'll join along the hop.  There are some amazing prizes and a TON of sponsors with awesome goodies.

Thanks for stopping by, see you again soon!

Coralynn  :)

Supplies: