Sunday, September 25, 2016

AAA Card Challenge Game #74 - Masking

Hello everyone!

We are back with a new AAA Cards game for you and it's Masking.


This is always a fun technique but I sometimes forget about it.  Fall is upon us and it is my absolute favourite time of year.  

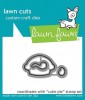
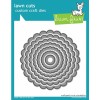
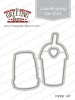
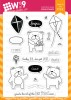
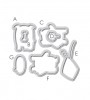
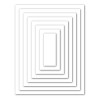
For my card today I wanted to use the adorable Lawn Fawn mini set.  To start I took a piece of post it note and die cut with the scalloped circle die to create a mask.  I then added the negative piece to my card and ink blended the area with Willow ink.  


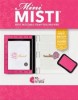
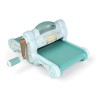
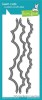
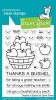
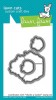
I took the sentiment and used my Mini MISTI to stamp the sentiment. I like using the MISTI when I stamp sentiments because I normally can't get anything straight even if I try and the die inks look best if you stamp them a couple of times. I then stamped and coloured in the apple pie with my copics and die cut with my Big Shot machine. I then added the little swirl over the pie and added the pie to the card with foam tape.


I have a video up on my YouTube channel.


Thanks for stopping by, see you again soon!

Coralynn  :)


Supplies:

Saturday, September 24, 2016

Mint Owl Studio - Merry Christmas

Hello everyone,

I'm back with another Christmas card for you using the Trim the Tree stamp set.  And did you know we now have coordinating dies as well?

I started out with a pice of watercolour paper and I added a couple of different blues to the card with my watercolour paints.  I did this in layers and heat set each layer before adding more colour.  I happen to love the harsher lines this technique gives.


I then stamped the ornaments in Versamark and heat embossed it with silver embossing powder.  I then took my Versamark pen and added the lines that the ornaments are hanging from and heat embossed them again along with the sentiment.

I then added a few dots using the Nuvo drops in glitter and let that dry before adhering the panel onto a card base.  I always manage to stick my finger in these dots thinking they are dry enough, and they never are.  But this time I put the card up so I wouldn't keep checking on them.  ;)


Thanks for stopping by, see you again soon!

Coralynn  :)


Friday, September 23, 2016

Fall Coffee Lovers Blog Hop

Hello everyone,

I can't believe the Coffee Lovers Bloghop is back again already!  I love this hop!  It's fun and I love seeing all the amazing cards being created with coffee, tea or hot chocolate.


I coloured in the images during Kathy Racoosin's last Colour Challenge and as soon as I had them coloured I knew exactly how I was going to use them.

I saved this card for the last two months as I wanted to save it just for today, for this hop.  I used the Perked Up stamps and dies from The Greeting Farm and coloured them in with my copics.
I then cut out a panel from the MFT rounded rectangle dies and used the Mint Owl Studio coffee bean stencil with some Espresso distress ink and added it to the die cut panel.


I stamped the sentiment that came with the set to the panel with Versafine onyx black ink.  Popped up the coffee with foam tape to the panel and then popped that up onto the card base.  I added some coffee coloured sequins from Mint Owl Studio to finish off the card.  


Hope you'll join along the hop.  There are some amazing prizes and a TON of sponsors with awesome goodies.

Thanks for stopping by, see you again soon!

Coralynn  :)

Supplies:


Wednesday, September 21, 2016

Thank You card - WPlus9

Hello everyone,

I'm back with a couple of cards and a video!

I had already created this card for my co-worker and loved it so much I wanted to create a couple more.


I took a circle die and cut out the circle from white card stock.  I then cut out the clouds and grass from which card stock to create stencils and then ink blended in the sky and grass with Willow and Cloudy Sky inks from Simon Says Stamp.  I messed up the one of the right but thought I'd leave it in as the struggle is real sometimes.


I used the WPlus9 Friends for all Season - Summer and that little puppy is just adorable.  I stamped the images with SSS Intense black ink on card stock and coloured them in with my copics.  I then die cut them and popped it up on foam tape onto the circle.  I then added the circle to the card base with foam tape as well.


Here's my video on YouTube. 


Thanks for stopping by, see you again soon.

Coralynn  :)


Supplies:


Saturday, September 17, 2016

New Release card share.

Hello everyone!

I'm back with another card with this months release which is available today in the shop

For my card I used the "Away in a Manger" stamp set along with the "Christmas Quilt" stencil.  I used what I'm calling the reverse stencil technique with I did with my previous card.  This was the second stamping to use up the ink left of the stencil. I then took some watercolour paints and coloured in the background.  


I used a circle from my stash along with a banner die cut from black card stock. I heat embossed the sentiment with white embossing powder and adhered it to the front panel. I then coloured and fussy cut Baby Jesus and popped it up with foam tape.  To finish off the card I added some Sparkle pen to the watercolour panel but you can't see it in these pictures.


We hope you'll head over to the shop to treat yourself with a few, or the entire release for this month!

Thanks for stopping by, see you again soon.

Coralynn  :)


Friday, September 16, 2016

Release Day Blog Hop - September

Hello everyone,

We are showcasing our newest release and it's beginning to look a lot like Christmas!!!!


Stay tuned to find out how you can get a chance to win the entire new release!  

Here is my card for the hop.  I used the Christmas Quilt stencil and I did something a bit different.  I used it in the opposite way as normal.  I used all the ink that was left on the stencil after I worked on another background and heat embossed it with white embossing powder.  I then ink blended with three different SSS inks for the gradient look.  


I then added the panel to a piece of black card stock and adhered it to the card base.  I heat embossed the sentiment from the Trim the Tree stamp set on black card stock and adhered it to the front panel with my tape runner.


Hop Order:
Coralynn - you are here!

Are you ready to see how you can get a chance to win all these goodies?  All you have to do is comment on this blog and each of the blogs on the hop.  The winner will be randomly chosen from one of the blogs, so the more blogs you comment on, the better your chance is to win!  

Thanks for stopping by, see you again soon.

Coralynn  :)


Tuesday, September 13, 2016

Lawnscaping Challenge - #137

Hello everyone,

It's been a long time since I played along with the Lawnscaping Challenges and this one was too good to pass up. It's a texture challenge and I was able to play with my new LF goodies and here is the card I came up with.  


On to my card.

I started by stamping out the apples in the basket image and instead of stamping the image onto a post it note, I used the coordinating die cut instead.  This way when I mask off the image it will leave the little border around it.  I added the grid stencil to the panel and then mixed up the translucent embossing paste with the Rusty Hinge distress ink.

After I removed the stencil and cleaned it and my craft surface off I allowed the paste to dry...yeah right, who am I kidding.  I didn't have the patience to wait so I was very careful when I coloured in the basket of applies with my Zig Clean Color Real Brush markers.


I cut out the front panel with the basic rectangle dies from SSS, added some natural twin from May Arts and popped it up with foam tape to a piece of rust coloured card stock from my local craft store.  I then die cut and added the LF scripty thanks die on top of the twine with liquid glue and finished of the card with some orange gems and added it all to an A2 sized card base.


That's it for me.  Thanks for stopping by, see you again soon.

Coralynn  :)


Supplies: