Showing posts with label MFT dies. Show all posts

Sunday, February 5, 2017

AAA Cards - Game #83 Shape your LOVE

Hello everyone,

We are up with a new challenge and love is in the air over at AAA Cards!  


I started with a piece of Bristol smooth card stock and used my Mission Gold watercolours.  I just love the colours and they are so creamy.  Bristol isn't the best for heavy watercolouring but I like the results I get when I use it. 


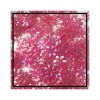
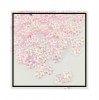
I then cut a heart out of the top part of the panel with the heart stax dies from MFT and saved the die cut for another project.  I added piece of acetate to the back along with foam tape to create the shaker  and filled it with wonderful sequin goodies from Studio Katia. I then placed the card base on to the shaker part and it was pretty easy to do when the base and panel are the same size.  You can just line them up and press it down.


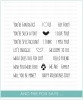
I then took a scrap piece of white card stock and cut out a banner from WPlus9 and stamped the sentiment from "What does the Fox say" from Studio Katia's November release with Hero Arts black ink. I adhered it to the front panel with Tombow Mono.


Sponsor: HLS - $15 gift certificate


We have an extra option for this challenge, in addition to the love theme you might like to shape up your card. It could be long and thin, a rounded square, circular, heart shaped or any other shape you can imagine, just make sure to keep it LOVE themed and CAS.


Thanks for stopping by, see you again soon.

Coralynn :)

Supplies:


Sunday, January 8, 2017

AAA Cards - Game #81 "Hello"


Hello everyone,

We are back with our first AAA Cards game of 2017!  I hope you all enjoyed the holidays. We had a very good Christmas with family.


I decided to make two cards for todays game.  For my first one, I used the MFT hello die and cut it out of the centre of my front panel.  I then took the Hero Arts striped background stamp and inked it up with the Lilac to Purple and cut a piece just big enough to cover the Hello.  I then stamped the sentiment with HA black dye ink from the Hello stamp and die set.  I then added fun foam to the back of the panel and then added it to an A2 sided card base. 


For the second card I used the positive die cut from the same piece of paper and adhered that to another card base and added a different sentiment from the same set with black ink.  


Our wonderful sponsor is offering a $15 gift certificate


Thanks so much for stopping by, see you again soon!

Coralynn  :)

Supplies:


Sunday, November 20, 2016

AAA Cards Game #78 - Circles

Hello everyone!

We are back with Game #78 with AAA Cards.

I always need birthday cards and today I needed one in a flash.  These would be great to mass produce as they are fun and fast to make.

Sometimes when my crafty mojo has taken the day off I cut up my card stock and make card bases and panels.  I find this relaxing and it gets me organized so that I have these ready when my mojo comes back.

I started with a pre-scored A2 sized card base and took a circle die and left one small part of the die just off the top of the card so that it keeps both pieces in tact.


I then took another size of the circle dies and cut out this fun patterned paper I received in a card kit a few months back. It's soft and subtle enough that this would make a great tag for a give or even a nice masculine card.  I used it because of the circles.  ;). I then took a Happy Birthday die from MFT and cut it out of black card stock and adhered it to the patterned paper and then I adhered the paper to the card base.  I didn't feel the card needed any embellishments so I called my card done.  


We would love for you to join us for our challenge so head on over to the link on our blog post.  We love seeing all the cards you create.  Please remember to keep those cards Clean and Simple!


Our amazing sponsor for this challenge is Stampendous. You can check out their
www.stampendous.com


Here are our guest designers for this challenge and they would love if you headed over to their blog to show them some crafty love. 
 Jessica V Lin from Jessie Handmade 


Thanks for stopping by, see you again soon.

Coralynn  :)

Supplies:


Saturday, October 15, 2016

Feel Better Soon - Card and Video

Hello everyone,

I had this idea in my head but wasn't sure how it was going to turn out so I turned on the camera.

I started out with the archival ink cubes that came in the SSS Nuts About You October card kit and added a bit of ink blending to the middle of an A2 sized card. Then I cut out a frame from the MFT single stitched frame dies and cut it out from white card stock and popped it up on foam tape to the card base.

I die cut the banner from the SSS basic banner dies and did some partial die cutting to have the flag ends and I used my mini MISTI to place and stamp the sentiment.  I popped it up on foam tape to the card base.


I stamped and colouring in the sweet elephant from SSS with SSS intense black and my copics.  I added the dot details to his nose and the top of his head.  When you watch the video, you'll notice that this was not included as it was an afterthought. I popped him up on foam tape as well and added him to the card.  I took the Nuvo Crystal drops from the SSS October card kit as they matched the Ranger ink perfectly, and added them to the card.  


I can't thank you all enough for your support with my YouTube channel and I am almost at 200 subscribers!  As soon as I hit that mark I'll have a small giveaway.  Stay tuned!


Thanks so much for stopping by, see you again soon.

Coralynn  :)

Supplies:

Wednesday, September 21, 2016

Thank You card - WPlus9

Hello everyone,

I'm back with a couple of cards and a video!

I had already created this card for my co-worker and loved it so much I wanted to create a couple more.


I took a circle die and cut out the circle from white card stock.  I then cut out the clouds and grass from which card stock to create stencils and then ink blended in the sky and grass with Willow and Cloudy Sky inks from Simon Says Stamp.  I messed up the one of the right but thought I'd leave it in as the struggle is real sometimes.


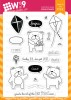
I used the WPlus9 Friends for all Season - Summer and that little puppy is just adorable.  I stamped the images with SSS Intense black ink on card stock and coloured them in with my copics.  I then die cut them and popped it up on foam tape onto the circle.  I then added the circle to the card base with foam tape as well.


Here's my video on YouTube. 


Thanks for stopping by, see you again soon.

Coralynn  :)


Supplies: