Showing posts with label Hero Arts. Show all posts

Monday, December 18, 2017

A Blog Named Hero - Mid-month Inspiration


Hello everyone,

I'm back with our mid-month inspiration with A Blog Named Hero and Simon Says Stamp.

It's a bitter sweet post for me as this is the last for the 2017 term.  Be sure to head over to our blog for the design team post for all the details.

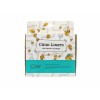
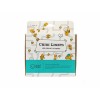
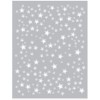
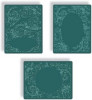
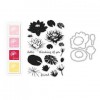
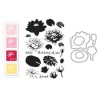
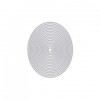
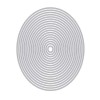
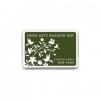
Now, for my card I used the Felicity Snowflake die again because it's awesome.  I used the Simon Says Stamp glitter paper and adhered it to an A2 size card base.


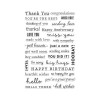
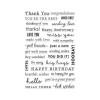
I then stamped and heat embossed the sentiment with white embossing powder on to black card stock. I then cut it out with my trimmer and adhered it with foam tape to the card. And that is my card.


Please help support A Blog Named Hero by shopping through our links. These are affiliate links, at no additional cost to you. We appreciate your support.


Monday, November 20, 2017

A Blog Named Hero - Mid month inspiration

 Hello everyone

We are halfway through our Copy a Designer challenge with Neat & Tangled over on A Blog Named Hero.

I copied Jessica's card from her July 19 post and you can see it here.

I too a piece of bristol cardstock and stamped the images from the Get Yeti stamp set and heat set it with white embossing powder.  Then I coloured in the images with my zig clean colour brush markers.

I cut out the panel with the Hero Arts postage stamp nesting die set and added some white spots with a gel pen and added a few black gems. I stamped the sentiment with white embossing powder and cut in the flag ends and popped it up with foam tape.  


I then took some white fun foam and added it to a blue piece of cardstock and then added it to an A2 sized card base and this card is done.  


I hope you'll join us for our challenge!  We love seeing what you created!

Please help support A Blog Named Hero by shopping through our links. These are affiliate links,
at no additional cost to you. We appreciate your support.
Hero Arts


Thanks for stopping by, see you again soon!


Sunday, October 29, 2017

AAA Cards Challenge #102 - Ink Blending

Hello everyone,

We are here with a new challenge over at AAA Cards and it's one of my favourites.  Wait, I think I say that about all of them!


I started with distress oxide inks as these are just fabulous. I used a stencil from Hero Arts and I blended in the worn lipstick and peacock feathers in the bottom corner of the card panel.  Then I stamped the sentiment with black ink and added a few Nuvo snow white drops to finish off the card.


Our wonderful sponsor Stamplorations is offering a $15 gift card!


Hope you'll join us!

Thanks for stopping by, see you again soon.

Coralynn  :)


Note:  Affiliate links are used wherever possible at no cost to you. Thank you for your support


Friday, October 20, 2017

Jump Start the Holidays with Hero Arts

Hello everyone,

Today we are hopping to celebrate all things fall and winter - and to rev up your holiday cardmaking motors! We are also joining Lea Lawson during her month-long Crafty Comeback Party. Lea is an amazing designer, and we are thrilled to support her! Tune into her blog every day this month - she began the party on October 7, and there have been many beautiful cards and fabulous giveaways along the way!  To make this party extra fun, we invited along the fabulously talented team at A Blog Named Hero! Lots of inspiration on this hop today.

Prize: We will be giving away a $25 gift certificate, randomly chosen from all of the comments left at every stop along the blog hop. To enter, leave a comment on any of the blogs by Friday, November 10 at 11:59 pst, and the winner will be announced on Lea Lawson's blog the on Sunday, November 12. 


For my card I used the postage stamp nesting dies and cut out a piece of red card stock. I then stamped the tree with Versamark and heat embossed it with white embossing powder and I did the same with the sentiment. 


I then added a chibitronic light to the back and used foam tape to pop it up.  I took a white card base and added Versamark to the sides and heat embossed it with gold embossing powder to tie in the gold star at the top of the tree.  I then lined it up with the light and removed all the backing from the foam tape and added it to the card base.  To finish off my card I added red stickles to tree.  


Here is a list of the hop.  Hope you'll join us along the way!

Monday, August 21, 2017

A Blog Named Hero Mid-month Inspiration

Hello everyone,

I'm here with A Blog Named Hero and our mid-month inspiration for our current challenge with Wow Embossing Power.

I started with the Abstract Waves Stencil and added Versamark ink to it and the pressed it onto some white card stock.  I then sprinkled the Wow bonding powder and heat set it till it was shiny. While it was still hot I pressed the foil onto the panel and burnished it with my bone folder then pulled away the foil. 


I took the Hello die from the Hello Stamp and Cut set and die cut two of them.  With one I added the foil like the other panel and with the other die, I cut it out of black card stock and heat embossed it with Hero Arts clear embossing powder to give it some dimension.  For the rest of the sentiment, I used Hero Arts white embossing powder and heat set it onto black card stock. 


I took the foiled panel and cut it into strips and added foam tape and added them to a pink piece of card stock. I then took the embossed sentiment to the strips with my tape runner and then added the hello die cut.  Once that was all done I adhered the entire panel to the card base and called it done. 


We hope you get inspired and don't forget to head on over to the blog post to add your projects to our link up. 


Please help support A Blog Named Hero by shopping through our links. These are affiliate links, at no additional cost to you. We appreciate your support.


Monday, June 19, 2017

A Blog Named Hero - Chibitronics Interactive Challenge Mid-Month Inspiration

Hello everyone,

We are already half way through the month of June with our Chibitronics Challenge at A Blog Named Hero!  It's hard to believe that my summer is finally here!

We are so excited for this months collaboration, mind you I say that every month.  And we are excited for everyone we do and this one is no exception. The more I work with these LED lights the more I fall in love with them. 

I used the Oxide distress inks in Worn Lipstick and Broken China to give it a Northern Lights type of feel to the watercolour.  I added some water splashes to the panel and wiped them up with paper towel. I then used the Hero Arts Star Confetti die and the Tim Holtz diffuser to only cut out the centre circle. 


This is how I built the light up card.  


Then I added the front panel to the base and when you press on the "S!" I took a piece of velum from my stash and added the die cut sentiment to it and added some perfect pearls water that I have mixed up on my desk.  Since I had all the lovely little stars cut out from the centre I didn't want to waste them so I added some to the front panel as well as the inside of the card.


I normally don't add anything to the inside so I did end up forgetting to take a picture of the inside of the card.  So sorry!


Thanks so much for stopping by, see you again soon!


Monday, April 17, 2017

Congratulations - A Blog Named Hero Anything Goes with Hero Arts


Hello everyone,

We are half way through out April challenge for A Blog Named Hero - Anything Goes with Hero Arts.

For my card today I wanted to use this candy stripe background stamp even though it is mostly for Christmas.

I stamped a card stock panel and also used the oval infinity dies to cut out the centre.  I then stamped out the lilies from the Layering Water Lily set with it's coordinating inks and then cut them out with the dies. I did use an extra green colour that did not come in the set for the buds. 


I added foam tape to the die cut panel and then added it to the card base.  I stamped the sentiment from the Many Everyday Messages set with black ink before added the flowers so that I can get my block inside the cut out.  I then added the flowers to the card.  


We hope you'll head over to our blog and link up your projects showing off your love for Hero Arts!

Thanks for stopping by,
See you again soon!